A power supply is the one component in a PC build where getting it wrong doesn’t just mean lower performance — it can mean instability, random shutdowns, or in rare cases damaged components. It’s also one of the easiest parts to under-research, because a PSU has no benchmarks or frame rates to compare. This guide covers the four things that actually matter when choosing one: how much wattage headroom to buy, what the 80 PLUS efficiency ratings mean, modular versus non-modular cabling, and the connector types you need to check — especially for modern high-wattage graphics cards.
If you want to know how a power supply works first, start with What Is a PSU?.
Quick answer
Calculate your system’s peak power draw and then add roughly 20-30% headroom on top of that figure when sizing a PSU, since components spike above their average draw and a unit run near its ceiling runs hotter and less efficiently. 80 PLUS Gold is a practical efficiency sweet spot for most mainstream builds, and semi-modular cabling is a sensible default.
Step 1: Calculate Your Wattage Needs, Then Add Headroom
Start by adding up the power draw of your components under load — CPU, GPU, drives, fans, and motherboard — rather than guessing. The PC Power Consumption Calculator does this for a full system, and the PSU Calculator converts that into a recommended PSU wattage with appropriate headroom already built in.
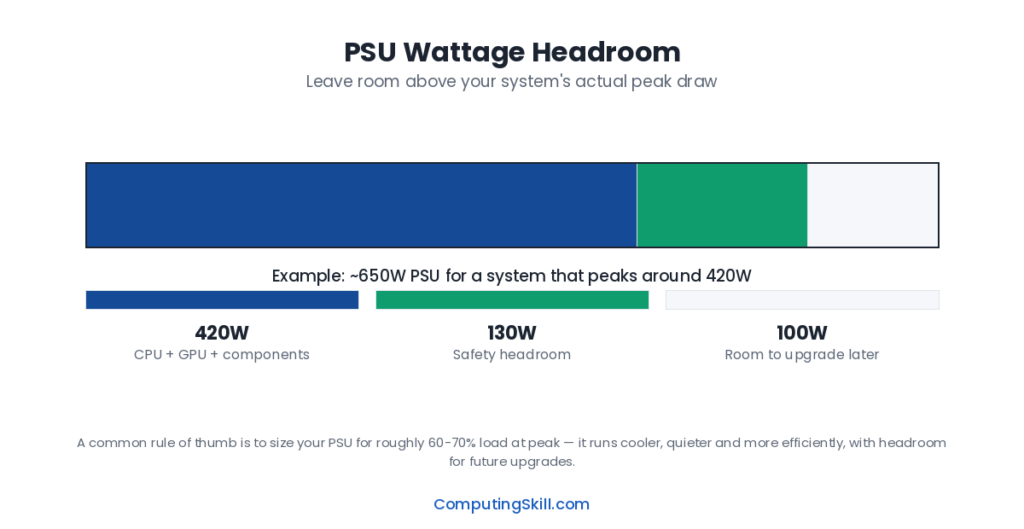
Headroom matters for three reasons. First, components draw more than their average rating in short power spikes (transient spikes), especially modern GPUs, and a PSU with no slack can trip its protection circuitry or cause instability during these spikes even if your calculated average draw is well within its rated wattage. Second, a PSU running near its maximum rated output continuously runs hotter, is noisier, and operates less efficiently than one with comfortable headroom. Third, headroom leaves room for future upgrades — a new GPU or an added drive — without needing an immediate PSU replacement.
A reasonable rule of thumb is to size your PSU for roughly 20-30% more than your calculated peak system draw. If your build draws 500W under load, a 650W unit gives comfortable, quiet headroom; an 850W unit gives you extra room for future GPU upgrades. This isn’t about wasting money on a wildly oversized unit — modern PSUs are efficient across a wide range of loads — it’s about avoiding a unit that spends its life running near its ceiling.
| Example GPU TDP | Manufacturer-Recommended PSU |
|---|---|
| 115W (RTX 4060) | 500W |
| 200W (RTX 4070) | 650W |
| 320W (RTX 4080) | 750W |
| 450W (RTX 4090) | 850W |
| 575W (RTX 5090) | 1000W |
These manufacturer-recommended figures already assume a reasonably typical CPU and system alongside the GPU — they aren’t just the GPU’s own TDP. Use them as a floor, and add more headroom if your CPU is also a high-power part or you plan to overclock.
Step 2: Understand 80 PLUS Efficiency Ratings
The 80 PLUS certification measures how efficiently a PSU converts the AC power from your wall outlet into the DC power your components use, at various load levels. A more efficient PSU wastes less power as heat, runs cooler, and costs a little less to run over time. The rating tiers, from lowest to highest, are Bronze, Silver, Gold, Platinum, and Titanium.
| Rating | Typical Efficiency at 50% Load | Good Fit For |
|---|---|---|
| 80+ Bronze | ~85% | Budget builds, entry and mid-range systems |
| 80+ Gold | ~90% | Most mid-range to high-end builds; the most common sensible choice |
| 80+ Platinum | ~92% | High-end builds, systems run for long hours daily, efficiency-conscious buyers |
| 80+ Titanium | ~94%+ | Top-tier builds where maximum efficiency justifies a price premium |
For most builders, 80+ Gold is the practical sweet spot — it offers a meaningful efficiency and build-quality step up over Bronze without the price premium Platinum and Titanium units command. Bronze is perfectly acceptable for a tighter budget as long as the unit is from a reputable manufacturer, since the efficiency difference translates to a relatively small difference in electricity cost for most usage patterns. Platinum and Titanium make more sense if you run your PC for long hours every day (for example, as a home server or for extensive workstation use) where the cumulative efficiency gap adds up over time, or if you simply want the highest-quality unit available for a high-end build.
Step 3: Modular vs Non-Modular Cabling
PSU cabling comes in three configurations:
- Non-modular: All cables are permanently attached to the PSU, whether you use them or not. This is the cheapest option but means dealing with excess cables you have to tuck away, which can restrict airflow and make cable management harder.
- Semi-modular: Essential cables (like the main motherboard and CPU power cables) are permanently attached, while less commonly needed cables (extra SATA or PCIe power) are detachable. This is a practical middle ground for most builds.
- Fully modular: Every cable is detachable, so you only connect exactly what your build needs. This gives the cleanest cable management and best airflow, at a price premium over otherwise similar non-modular or semi-modular units.
Fully modular is worth the premium if you value clean cable routing and easier future upgrades (swapping a cable for a different length or connector type without living with unused cables permanently attached). Semi-modular is a sensible practical choice for most builders, and non-modular remains a reasonable way to save money on a budget build where cable management is a lower priority.
Step 4: Check Connector Types — Especially for Modern GPUs
Before buying a PSU (or a GPU), confirm the unit has the connectors your components actually need:
- 24-pin ATX: The main motherboard power connector — present on essentially every PSU.
- 4+4 pin or 8-pin EPS: CPU power connector(s); some higher-end motherboards require two.
- 6+2 pin PCIe: The traditional GPU power connector, still used by many current cards, often requiring two or three per card depending on the GPU’s power draw.
- 12VHPWR / 12V-2×6: The newer single-cable high-wattage connector used by many current high-end GPUs to deliver large amounts of power (up to 600W on some implementations) through one connector instead of multiple traditional PCIe cables. Check whether your PSU has a native cable for this connector or whether the GPU ships with an adapter to convert from traditional PCIe connectors — and if using an adapter, make sure it’s fully and correctly seated, since a poorly seated high-wattage connector is a known source of overheating issues.
This is one of the most common compatibility mistakes in a new build: buying a high-end GPU that needs a 12VHPWR/12V-2×6 connector and discovering your existing PSU only has traditional PCIe cables with no compatible adapter included. Always check the GPU’s required connector type against your PSU’s available cables (or a PSU you’re planning to buy) before finalizing either purchase, and run the pairing through the PC Compatibility Checker as a final check.
Step 5: Buy From a Reputable Manufacturer
A PSU sits at the top of your entire system’s power delivery, so build quality genuinely matters more here than in almost any other component. Look for units that carry independent 80 PLUS certification (verifiable through the certification’s public database rather than just a label on the box), a reasonable manufacturer warranty (typically five to ten years on mid-range and higher units, signaling the manufacturer’s own confidence in the build), and consistent, credible reviews from independent, technically detailed sources that test actual load behavior rather than just listing specs. Avoid units with no verifiable 80 PLUS certification, an unusually short warranty for their price tier, or specs that seem inconsistent with their price point — these are the practical red flags to check for regardless of which specific brand you end up choosing.
Key Takeaways
- Calculate your actual system wattage, then buy roughly 20-30% more headroom than that calculated peak.
- 80+ Gold is the practical efficiency sweet spot for most builds; Bronze is fine on a budget, Platinum/Titanium for heavy daily use.
- Semi-modular is a solid default; fully modular is worth it for cable management, non-modular is fine for tight budgets.
- Always verify connector types — especially the 12VHPWR/12V-2×6 connector on modern high-wattage GPUs — before buying.
- Prioritize verifiable 80 PLUS certification and a solid warranty over brand marketing when comparing specific units.
Frequently Asked Questions
What size PSU do I need for my build?
Calculate your system’s peak power draw (CPU, GPU, drives, and other components under load) and then add roughly 20-30% headroom on top of that figure. Use the PC Power Consumption Calculator and PSU Calculator to get a specific wattage recommendation for your exact parts list.
Is 80+ Bronze good enough, or do I need Gold?
Bronze is perfectly acceptable for budget builds from a reputable manufacturer. Gold is the more common recommendation for mid-range and higher builds because it offers meaningfully better efficiency and typically better build quality without the price premium of Platinum or Titanium.
Do I need a fully modular PSU?
No — it’s a convenience and cable-management upgrade, not a performance requirement. Semi-modular covers most builders’ needs well, and non-modular is fine if you’re prioritizing cost over cable tidiness.
What is the 12VHPWR or 12V-2x6 connector and do I need it?
It’s a newer single-cable connector used by many current high-wattage GPUs to deliver large amounts of power through one cable. You need a PSU with a native cable for it, or a properly seated adapter, only if your specific GPU requires that connector — check your GPU’s specifications before assuming your existing PSU’s cables will work.
Can a PSU that's too small damage my components?
An underpowered or failing PSU is more likely to cause instability, random shutdowns, or failure to boot under load than direct component damage, though a poor-quality unit with inadequate protection circuitry does carry more risk. This is exactly why buying adequate headroom from a reputable, properly certified unit matters.
Can I reuse my old PSU when I upgrade my GPU?
Only if it has enough wattage headroom for the new GPU’s power draw and has the correct connectors the new card requires. Check both before assuming your existing PSU will work with a new, more powerful graphics card.